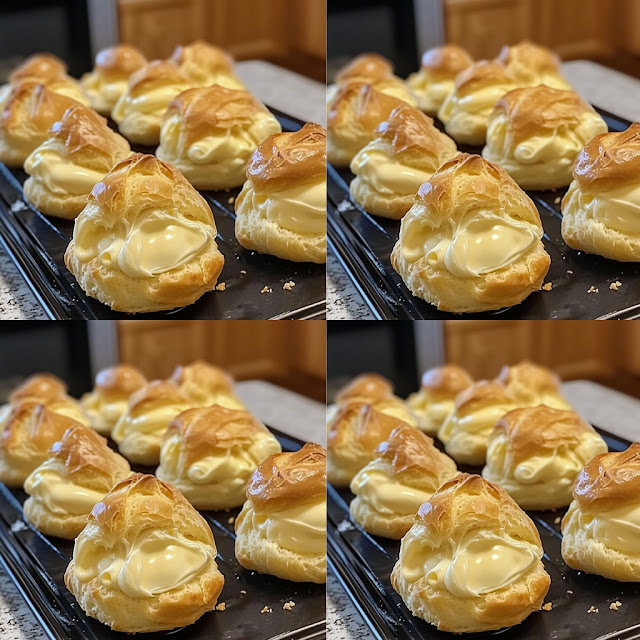
- 1 cup (240ml) water
- ½ cup (113g) unsalted butter
- ¼ teaspoon salt
- 1 cup (125g) all-purpose flour
- 4 large eggs
Optional Filling Ideas:
- Vanilla pastry cream
- Whipped cream
- Chocolate ganache
- Lemon curd
- Ice cream
Optional Toppings:
- Powdered sugar
- Chocolate glaze
- Caramel drizzle
- Fresh berries
Step-by-Step Instructions
Step 1: Preheat the Oven
Preheat your oven to 400°F (200°C) . Line two baking sheets with parchment paper.
Step 2: Cook the Dough
In a medium saucepan:
- Combine water, butter, and salt.
- Bring to a boil over medium heat.
- Remove from heat and quickly stir in the flour until the mixture forms a smooth ball.
Step 3: Dry Out the Dough
Return the pan to low heat and stir constantly for about 2 minutes to dry out the dough slightly. This helps prevent cracking and ensures proper rise.
Step 4: Add the Eggs
Transfer the dough to a mixing bowl. Add one egg at a time, stirring well after each addition until the mixture is smooth, glossy, and holds its shape when lifted with a spoon.
Step 5: Pipe or Spoon the Puffs
Using a piping bag fitted with a large round tip, pipe 1½-inch rounds onto the prepared baking sheets, leaving space between each puff. Alternatively, use two spoons to scoop and shape the dough.
Step 6: Bake Until Golden
Bake for 20–25 minutes , or until the puffs are golden brown and firm to the touch. Do not open the oven during the first 20 minutes — this prevents deflation.
Step 7: Cool and Fill
Let the puffs cool completely. Use a small knife or toothpick to poke a hole in the bottom of each puff to release steam. Once cooled, fill using a piping bag or by slicing in half and adding your favorite filling.
Tips for Perfect Cream Puffs Every Time
- Use room temperature eggs – They incorporate more easily into the dough.
- Don’t skip the drying step – Cooking the dough briefly on the stove helps create structure and improves rise.
- Avoid opening the oven too early – The steam inside is what makes the puffs rise.
- Cool completely before filling – Otherwise, the filling may melt or make the puffs soggy.
- Store unfilled puffs in an airtight container – They stay crisp for up to 3 days or can be frozen for a month.
Creative Ways to Serve Your Cream Puffs
Once you’ve mastered the basic cream puff, the sky’s the limit! Here are some delicious ways to enjoy them:
🍫 Chocolate-Dipped Cream Puffs
Dip cooled puffs in melted chocolate and let them set on wax paper.
🍓 Strawberry Shortcake Puffs
Fill with whipped cream and fresh strawberries for a fruity twist.
🍨 Ice Cream Sandwiches
Split the puffs in half and sandwich with your favorite ice cream. Freeze and serve as mini ice cream treats!
🧁 Mini Cream Puff Tower
Stack filled puffs with caramel or chocolate sauce for an impressive centerpiece.
☕ Coffee or Tea Pairing Treats
Serve plain or lightly dusted with powdered sugar alongside your morning coffee or tea.
Frequently Asked Questions (FAQs)
Q: Can I make the dough ahead of time?
A: Yes! You can refrigerate the dough overnight and bake it fresh when ready.
Q: Why did my cream puffs collapse?
A: Opening the oven too early or under-baking can cause them to deflate. Be patient and avoid peeking!
Q: Can I make gluten-free cream puffs?
A: Yes! Substitute regular flour with a 1:1 gluten-free flour blend.
Q: How do I keep the puffs crispy after baking?
A: Store them in an airtight container once completely cooled. Re-crisp in the oven if needed.
Q: What if I don’t have a piping bag?
A: No problem! Use a spoon or even a ziplock bag with the corner cut off.
Final Thoughts
These Easy Cream Puffs prove that gourmet desserts don’t have to be complicated. With just a few simple ingredients and a little patience, you can create bakery-quality treats right in your own kitchen.
Whether you're new to baking or a seasoned pro, this recipe is a must-try. So grab your ingredients, preheat your oven, and get ready to impress with these light-as-air, creamy delights!

